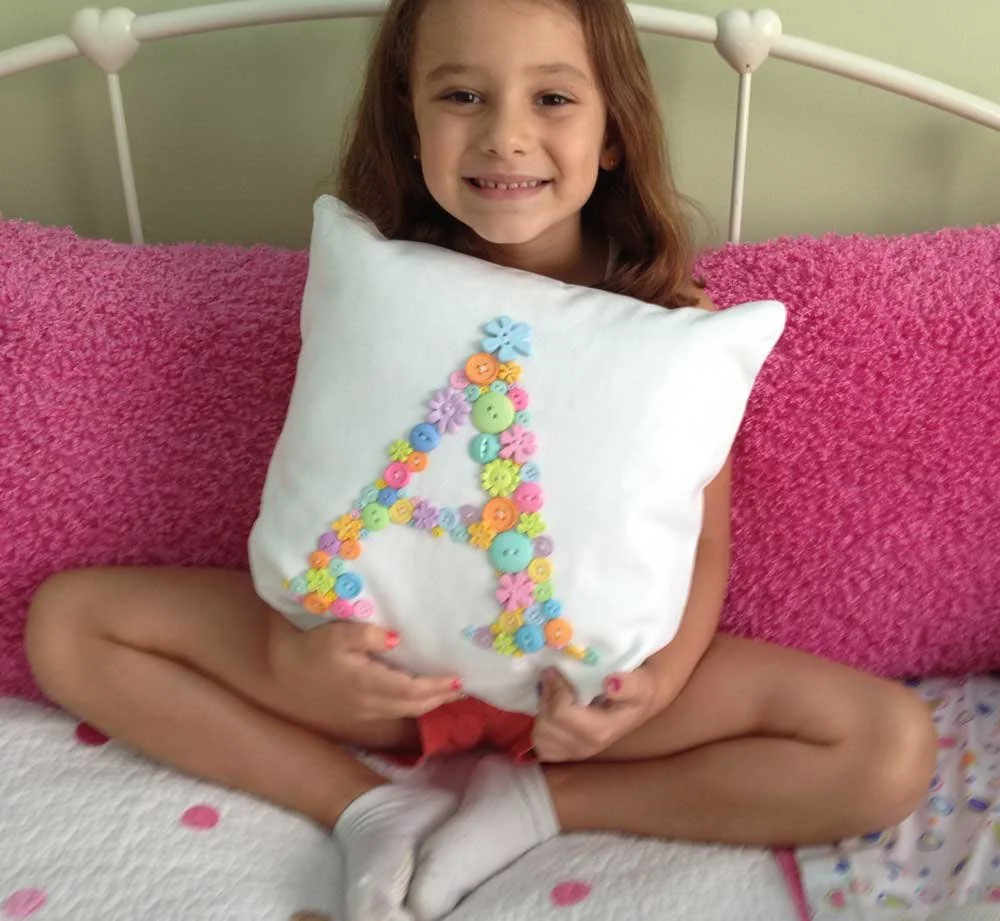
DIY: What Is Button Art?
What is button art? Simply put, button art is a craft that involves using buttons on a surface. This surface can be (to name a few) fabric, wood, or canvas. What you create is limited only by your imagination. Have you seen the beautiful button art that is out there? Perhaps you have even purchased some on Etsy or other marketplaces. Maybe you would like to create some yourself. Check out my Pinterest Button Art Board where you will find some ideas for button art as well as other DIY crafts.
MY PROJECTS
I have two granddaughters, and I wanted to make them each some button art. For Adrianna, I made a button pillow with the letter A. It was so easy to do. And, for Chloe, I made button wall art with the letter C. Just in case you would like to try doing some button art, here are my step-by-step tutorials.
BUTTON PILLOW
SUPPLIES:
Fabric
Buttons
Pillow Insert
Pencil
Glue (optional)
Thread
I bought all of my supplies at Joann but you can buy them just about anywhere - Michaels, Hobby Lobby, or Amazon.
INSTRUCTIONS:
Step One: Cut out your pillow. Just add one inch to the size of your pillow form. My pillow form was 14” so I cut two squares 15” each.
Step Two: Create the letter on your computer in the font of your choice. I used Times New Roman for the A. Print it out and cut it out.
Step Three: Lightly trace the letter onto your fabric.
Step Four: Start laying out your buttons. I used a mixture of colors and sizes for my pillow. I loved the buttons that I used because they came in a variety of shapes, sizes, and colors. The possibilities are endless.
Step Five: Sew the button in place. I started out using glue but found that sewing them was easier. You can see what works better for you. Be patient. This will take some time. So put your feet up and enjoy!
Step Six: If you have never sewn a pillow before, no worries, it is really easy. You can sew by hand or by machine. Pin the right sides of the fabric together and sew 1/2” away from the edge. Just be sure to leave an opening on one side of the pillow so you can insert your pillow form. You will close that by hand once you are done. I recommend when sewing that you round the corners a bit as well.
And that’s it. You will have a beautiful, finished button pillow.
BUTTON WALL ART
I wanted to make something special but different for my youngest granddaughter, Chloe. After looking on Pinterest for ideas, I decided to make button monogram wall art.
SUPPLIES:
Canvas of your choice - I chose a 16 x 20 x .75 canvas
Buttons
Fabric - enough to cover your canvas
Thread
Frame - Optional
INSTRUCTIONS:
Step One: Cut your fabric 2 - 4” larger than your canvas.
Step Two: Print out your Monogram, cut it out, and trace it on your fabric.
Step Three: Sew on the buttons. Again, this will take a little while. So put your feet up, and relax, and enjoy the process!
Step Four: Wrap your fabric around your canvas and staple it down.
And you are done!
For complete instructions with detailed pictures, click here.
Don’t you agree that the finished art is simply amazing!!
Button Art can cost upwards of $150 and more and I understand why - it’s very time-consuming. But if you have the time and the desire you can Do It Yourself for a fraction of the cost! If you have made button art, I’d love to see it. Feel free to share your pictures in the comments.
If you enjoyed this article and would like to read more like this, just sign up below so you won’t miss a thing. You’ll also receive a 10% off coupon to use in my shop.
Thanks for stopping by.
Until next time…


